Homemade protein granola bars weren’t always part of my weekly routine. But that changed the day I flipped over a pricey store-bought bar and realized I couldn’t pronounce half the ingredients. I figured, why not try making my own?

I threw together some oats, almond butter, and a scoop of plant-based protein. After a couple of tweaks, I ended up with a chewy, satisfying snack that quickly became a staple in my fridge.
Now, they’re right up there with my favorite clean treats like these fruit granola bars. Simple, customizable, and made without the junk.
If you’ve been searching for a healthy, affordable snack that’s easy to make, you’re going to love what’s ahead.
Table of Contents
The Rise of Homemade Protein Granola Bars
Why Homemade Protein Granola Bars Are Trending
The rise of homemade protein granola bars isn’t just a health craze, it’s a smart, long-term shift in how we snack. People are tired of processed, overpriced bars with questionable ingredients. Instead, they’re choosing to make their snacks with ingredients they recognize and trust.

Making homemade protein granola bars gives you full control. You can tweak every aspect of protein level, sweetness, and texture to fit your needs and preferences. Plus, they’re easier to make than most people think. No baking required, just mix, press, chill, and enjoy.
More importantly, homemade snacks like these help you break free from hidden sugars, artificial binders, and preservatives found in store-bought versions. Once you try a real granola protein bar recipe made at home, it’s hard to go back.
Don’t miss our naturally sweet alternative: Homemade Gluten-Free Granola Bars
Benefits of Making Your Protein Snacks at Home
There are plenty of reasons why making protein snacks at home is on the rise:
1. You Know What’s Inside
From oats to nut butters and your favorite protein powder, you control the recipe. No surprises.
2. Custom Nutrition
With the right granola bars with a protein base, it’s easy to increase fiber, reduce sugar, or boost healthy fats.
3. Major Cost Savings
Why pay $3 to $5 per bar when you can make a batch of protein homemade granola bars at home for a fraction of the price?
4. Dietary Flexibility
Whether you’re gluten-free, dairy-free, vegan, or nut-free, you can build a recipe that fits your needs.
5. Better Taste & Texture
Freshly made bars are softer, chewier, and simply taste better. You’ll never have to settle for dry, chalky store-bought bars again.
Looking for inspiration? Try this nut-free variation: Nut Free Granola Bar Recipe
Key Ingredients in Homemade Protein Granola Bars
The Ingredients I Always Start With: Oats, Nuts & Seeds
When I first started experimenting with homemade protein granola bars, I quickly learned that the ingredients you start with make all the difference. I don’t use anything fancy, just real, whole ingredients that I already trust in my everyday cooking.
Rolled Oats Are My Go-To Base
I almost always begin with gluten-free rolled oats. They’re hearty, affordable, and give the bars that classic chew I love. I’ve tried quick oats before, but they made the bars too soft for my liking.
I Never Skip the Nut Butter
A creamy almond or peanut butter not only adds flavor it also holds the bars together. Plus, it’s a great source of natural fats and protein. If I’m making a nut-free batch, I’ll use sunflower seed butter, and it works just as well.
Seeds for Texture and Plant Protein
Chia seeds, flax, and pumpkin seeds are staples in my pantry. I sprinkle them into almost every granola protein bars recipe I make. They add crunch, fiber, and that extra dose of plant protein without changing the flavor much.
If I’m in the mood for something fruity, I’ll sometimes mix in dried cranberries or goji berries just like I do in my fruit granola bars. They’re such a refreshing twist.
Choosing the Right Protein for My Bars
At first, I was overwhelmed by the protein powder aisle. But after lots of testing, I found a few options that really work in a protein granola bars homemade recipe.
Plant-Based Protein for a Clean Boost
I prefer pea or hemp protein for most of my recipes. They’re vegan-friendly, and they don’t overpower the flavor if you use a light hand. When I’m making a batch for friends who are dairy-free, this is what I reach for.
Why for That Creamy Texture
If I’m making bars for myself and I want something creamy and smooth, I’ll go with a grass-fed whey protein. It mixes easily and gives the bars a little extra softness.
Collagen for a Hidden Protein Punch
I’ve recently started using collagen peptides in some batches. They’re flavorless and blend right in, especially when I want to make a more neutral-tasting protein granola bars recipe.
No Powder? No Problem.
Some days, I skip the powders altogether. Instead, I’ll use hemp seeds, quinoa flakes, or crushed almonds to raise the protein content naturally. That’s the beauty of creating your recipe high protein granola bars, you can adapt them based on what’s already in your kitchen.
Sometimes I’ll experiment with flavor combinations from other recipes I love, like the rich, clean taste I get in my raw vegan matcha cheesecake. Flavors like matcha or cacao work surprisingly well in protein bars, too.
How I Make High Protein Granola Bars at Home
Step-by-Step: My Go-To Recipe for Homemade Protein Granola Bars
After a few failed attempts and a couple of crumbl messes, I finally found a method that works every single time. It’s simple, quick, and the bars come out exactly how I like them: chewy, satisfying, and packed with clean protein.
Here’s how I make my favorite protein granola bar recipe at home:
Ingredients I Use:

- 1½ cups gluten-free rolled oats
- ½ cup nut or seed butter (I use almond or sunflower)
- ¼ cup honey or maple syrup
- ⅓ cup protein powder (pea, whey, or collagen)
- ¼ cup chopped nuts or seeds (pumpkin seeds, almonds, chia)
- ¼ tsp cinnamon
- Pinch of sea salt
- Optional: dried fruits, dark chocolate chips, shredded coconut
How I Put It All Together:
Mix Dry First
I start by combining the oats, protein powder, seeds, and spices in a bowl.

Heat the Binder
I gently warm the nut butter and honey together in a saucepan or microwave until smooth.

Combine Wet and Dry
I pour the warm mixture over the dry ingredients and mix thoroughly. If it’s too dry, I add 1–2 tablespoons of non-dairy milk.

Press into a Pan
I press the mixture into a parchment-lined 8×8 pan and flatten it with the back of a spoon or spatula.

Chill and Slice
I refrigerate it for 1–2 hours until firm, then slice it into bars.


It is that simple. Once I got the hang of it, I started making these bars weekly as part of my Sunday prep. Sometimes I double the batch because they disappear fast!
Check out a gluten-free twist I love: Homemade Gluten-Free Granola Bars
Mistakes I Made (So You Don’t Have To)
I didn’t get it right on my first try, and that’s okay. Here are a few things I learned from my early flops with homemade granola bars protein recipes:
1. Too Much Protein Powder Can Ruin the Texture
The first time I made these, I added a full cup of protein powder, and the bars turned out dry and powdery. Now I stick to around ⅓ cup per batch. It keeps them soft and chewy without that chalky aftertaste.
2. Not Pressing Firmly Enough
The bars fell apart because I didn’t press the mixture down hard enough in the pan. Now I use the bottom of a flat glass to really compact the mixture.
3. Skipping the Chill Time
I used to slice the bars too soon, which made them crumble. Letting them chill fully in the fridge makes all the difference.
4. Overloading the Add-Ins
Adding too many extras like nuts, chocolate, and fruit can make the bars too loose. I stick to one or two max, especially in a granola protein bars recipe where balance is key.
These small adjustments made a big difference. Now, I have a go-to recipe that’s not only easy but flexible enough to change based on what I have on hand.
Binding & Texture Techniques That Work
How I Get Homemade Protein Granola Bars to Stick Together
One of the biggest challenges I faced early on was getting my homemade protein granola bars to stay in one piece. The flavor was there, but every time I picked one up, it crumbled into granola. After a few messy snack fails, I finally figured out what was missing: the binder.
What makes or breaks the texture of homemade protein granola bars is the right balance between dry and sticky ingredients. If it’s too dry, they fall apart. If it’s too wet, they don’t hold their shape after cutting. It took some experimenting, but now I have a few go-to methods that work every single time.
My Favorite Natural Binders
Here’s what I use regularly to keep my bars chewy and intact:
1. Nut or Seed Butter
Creamy almond butter or sunflower seed butter gives structure, flavor, and richness. I warm it slightly before mixing to help it coat the dry ingredients evenly.
2. Honey or Maple Syrup
A natural liquid sweetener is a must. Honey is stickier, but I often go with maple syrup for a fully vegan version. It acts as the “glue” that holds everything together.
3. Medjool Dates (Sometimes)
While I avoid dates in most of my recipes here on the blog, I’ve used them once or twice when I wanted a softer, fruitier batch. Blending them into a paste can create a strong binder, especially if you’re avoiding all syrups.
4. Chilling Is Non-Negotiable
Regardless of the binder I use, I always chill the bars for at least 2 hours before slicing. That’s what helps everything set properly.
Learn more about soft, naturally sweet variations in my fruit granola bars
Tips That Changed Everything for Me
I used just to throw everything into a bowl and hope for the best. But if you want a consistent texture in every bite, here’s what I now always do when making homemade protein granola bars:
- I mix dry ingredients first so the binder coats everything evenly
- I press the mixture firmly into the pan, really press it using a flat-bottom glass
- I don’t cut corners on the chill time. Ever.
Once I followed these steps, I stopped wasting ingredients and finally had a batch I could pick up without it falling apart. Whether I’m making a nut-free version or adding dark chocolate chips, these tips help keep every bar clean-cut and satisfying.
Storage, Packaging, and Shelf Life Tips
How I Keep My Homemade Protein Granola Bars Fresh All Week
When I first started making homemade protein granola bars, I didn’t think much about how to store them. I just wrapped them in foil and tossed them in the fridge. But by day three, they were either too hard, too soft, or starting to dry out. So I started testing different storage methods, and now I’ve got a system that works every time.
Here’s how I keep my bars fresh, firm, and ready to grab even days later.
I Always Let Them Chill Before Cutting
Right after mixing, I press the mixture into a lined pan and refrigerate for at least 2 hours. This helps them firm up and hold their shape.
Airtight Storage Is Non-Negotiable
Once sliced, I store my homemade protein granola bars in an airtight container. I’ll layer parchment paper between them to keep them from sticking.
Fridge or Freezer? It Depends
- Fridge: If I plan to eat them within a week, the fridge is perfect. They stay chewy and cool.
- Freezer: If I make a double batch or want to keep them for later, I freeze them individually in wraps or bags. They defrost quickly and taste just as good.
How I Pack Them for On-the-Go Snacks
I’m always reaching for snacks on busy workdays or while I’m out running errands, so making my homemade protein granola bars travel-friendly was a must.
Here’s what I’ve learned:
1. Wrap Them Individually
I use parchment paper or reusable snack wraps to keep each bar fresh and portable. No plastic waste, and they stay neat in my bag.
2. Keep Them Cool
In warmer months, I’ll pack them with an ice pack if I’m going to be out for hours. Nut butter-based bars can soften in heat, so this keeps the texture intact.
3. Label the Flavors
When I make multiple batches, I jot the flavor and date on a tiny piece of tape and stick it on the wrap. That way, I never forget what’s inside.
Being able to prep and store my homemade protein granola bars has saved me from countless snack emergencies. Whether I’m heading to a workout, traveling, or just need something between meetings, these bars are always ready when I need them.
Creative Flavors & Variations to Try
How I Keep Homemade Protein Granola Bars Interesting
I’ll be honest, when I first started making homemade protein granola bars, I stuck with the basics: oats, nut butter, and vanilla protein. But after a few weeks of the same flavor, I wanted something new. So I started experimenting.
That’s when the fun began.
Over time, I’ve developed a list of go-to flavor combos that keep things exciting without complicating the process. Whether you’re craving something indulgent or something light and fruity, there’s always a variation worth trying.
My Favorite Flavor Combos
1. Chocolate Chip Almond Butter

I add dark chocolate chips, almond butter, and a dash of sea salt. It tastes like a healthier cookie bar, and it’s one of my most requested versions.
2. Peanut Butter Banana

I mash half a ripe banana into the mixture and pair it with peanut butter and cinnamon. It’s naturally sweet and incredibly satisfying.
3. Matcha Coconut

I take inspiration from one of my favorite desserts and mix matcha powder with unsweetened shredded coconut. It’s light, earthy, and packed with clean energy.
4. Mocha Hazelnut

Cocoa powder and a splash of brewed coffee turn your bars into a high-protein coffeehouse treat. Add crushed hazelnuts for extra crunch.
5. Berry Nut-Free

For a nut-free option, I use sunflower seed butter, pumpkin seeds, and dried blueberries or cranberries. It’s simple, allergy-friendly, and fresh.
Looking for more allergy-friendly inspiration? Try this: Nut-Free Granola Bar Recipe
Customizing Bars for Every Diet
The best part about making homemade protein granola bars is that I can tailor them to nearly any lifestyle or restriction. Here’s how I modify the base recipe:
- Vegan? Use maple syrup and plant-based protein powder.
- Nut-Free? Sunflower seed butter works like a charm.
- Keto or Low-Carb? Skip the oats and use crushed nuts, coconut flour, and a low-carb protein powder.
- Low Sugar? I cut back on sweeteners and add a few drops of vanilla or cinnamon for flavor.
These days, I view my batch of homemade protein granola bars as a blank canvas. Once you have the base recipe down, the possibilities are endless. And best of all, you never get bored.
FAQs About Homemade Protein Granola Bars
Is it cheaper to make your protein bar?
Absolutely. When I started making homemade protein granola bars, I quickly noticed the cost savings. Instead of spending $3–$5 on a single store-bought bar, I can make a whole batch for less than what I used to pay for two. Buying ingredients like oats, nut butter, and protein powder in bulk has saved me a lot over time, and I get way more bars out of it.
How do I make high-protein granola bars at home?
I keep it simple. I mix rolled oats, a protein powder I trust, nut or seed butter, and a natural sweetener like honey or maple syrup. I also throw in things like chia seeds, pumpkin seeds, or hemp hearts for extra protein. Once everything is mixed and pressed into a pan, I chill the mixture until firm, then slice it into bars. That’s my go-to granola protein bars recipe.
How do I get homemade protein bars to stick together?
This took me a few tries to figure out! The secret is using the right binder and enough of it. Nut butter and honey (or maple syrup) do the job beautifully. I also press the mixture firmly into the pan and make sure to chill it for at least two hours before slicing. That combo has kept my protein granola bars homemade from crumbling every time.
Are protein granola bars healthy?
They can be, especially when you make them yourself. I avoid added sugars, processed oils, and artificial flavors. Instead, I load mine with fiber, healthy fats, and clean protein. My homemade granola bars protein recipes keep me full and focused without the sugar crash I used to get from packaged snacks.
How can I add extra protein to granola?
Aside from protein powder, I’ve found that adding seeds like hemp, chia, and pumpkin really helps. Sometimes I mix in quinoa flakes or even chopped almonds for an added boost. It’s easy to increase protein without changing the flavor too much.
What do I use to bind granola bars together?
Nut butter is my favorite binder, but I also rely on maple syrup or honey for that stickiness. Occasionally, I’ll blend Medjool dates into a paste and use that. The key is to find the right balance of moisture and stickiness to hold everything in place.
Conclusion
After making homemade protein granola bars for the past couple of years, I can honestly say I’ll never go back to the store-bought kind. What started as a way to clean up my snacking turned into a weekly habit that saves money, supports my health goals, and gives me full control over what goes into my body.
If you’ve never made your own before, I promise it’s easier than you think. Start with simple ingredients, play around with flavors you love, and adjust as you go. The best part? Once you master your version of homemade protein granola bars, you’ll always have a healthy, satisfying snack ready when you need it.
Looking for more quick, wholesome snack ideas?
Don’t miss our guide to Quick & Easy Raw Vegan Recipes, it’s where a lot of my favorite snack staples live.
From my kitchen to yours, enjoy the bars, and make them your own.
👩🏻🍳 Recipe
Print
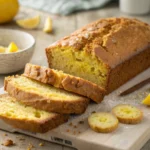
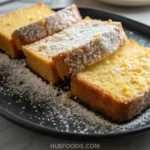
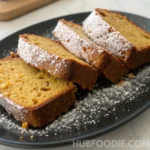
Homemade protein granola bars
- Prep Time: 10 minutes
- Cook Time: 0 minutes (no-bake)
- Total Time: 10 minutes
- Yield: 10–12 bars
- Category: Snack
- Method: No-bake
- Cuisine: American
- Diet: Vegan
Description
These no-bake homemade protein granola bars are soft, chewy, and packed with clean ingredients like oats, nut butter, and plant-based protein. They’re quick to make, naturally sweetened, and perfect for meal prep or grab-and-go snacks.
Ingredients
- 1½ cups rolled oats (gluten-free if needed)
- ½ cup almond butter or sunflower seed butter
- ¼ cup honey or maple syrup
- ⅓ cup protein powder (whey, plant-based, or collagen)
- ¼ cup chopped nuts or seeds (e.g. pumpkin seeds, almonds, chia seeds)
- ¼ tsp cinnamon
- Pinch of sea salt
- Optional add-ins: dried fruit, dark chocolate chips, shredded coconut
Instructions
- In a mixing bowl, combine oats, protein powder, seeds, cinnamon, and salt.
- Warm nut butter and honey/maple syrup in a saucepan or microwave until smooth.
- Pour the warm mixture over dry ingredients and stir until fully combined.
- Line an 8×8 pan with parchment paper and press the mixture firmly into the pan
- Refrigerate for at least 2 hours or until set.
- Slice into bars and store in an airtight container in the fridge or freezer.
Notes
Adjust protein powder amount to taste; avoid adding too much or bars may turn dry.
Add 1–2 tablespoons of non-dairy milk if the mixture feels too dry.
Keep chilled for best texture.
Customize with flavors like cocoa, matcha, vanilla, or nut-free options.
Note: These values are estimates based on standard ingredients.
Love what you see? Follow me on Facebook and Pinterest for more easy, delicious recipes and daily inspiration!